


The new 45Ah ONYX batteries use QS8 discharge connectors.
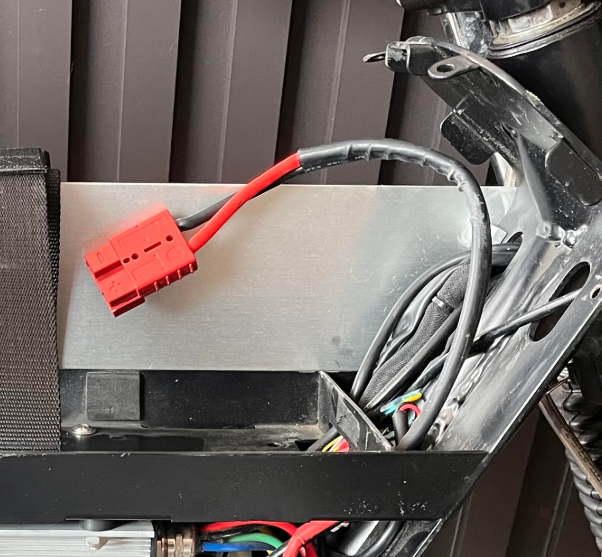
If your bike still uses the older red Anderson SB50-style connector, you’ll need to swap out your main battery cable to be QS8-compatible.
👉 Buy the ONYX QS8 Main Battery Cable
⚠️ Note: Anderson-style battery leads are not compatible with the new 45Ah ONYX batteries.
Step-by-Step Installation
1. Remove the Righthand Side Panel
-
To access one of the five panel screws, you'll need to remove the seat.
-
If you do not have a rear rack installed, you can instead loosen the four seat nuts and slide the seat backward and out of the way.
2. Unplug & Remove the Battery
-
Disconnect your battery and remove it from the tray.
3. Remove the Existing Battery Cable
-
Use a 14mm wrench to remove the two terminal nuts securing the existing Anderson battery lead.
-
Remove the old Anderson cable completely — it will no longer be used.
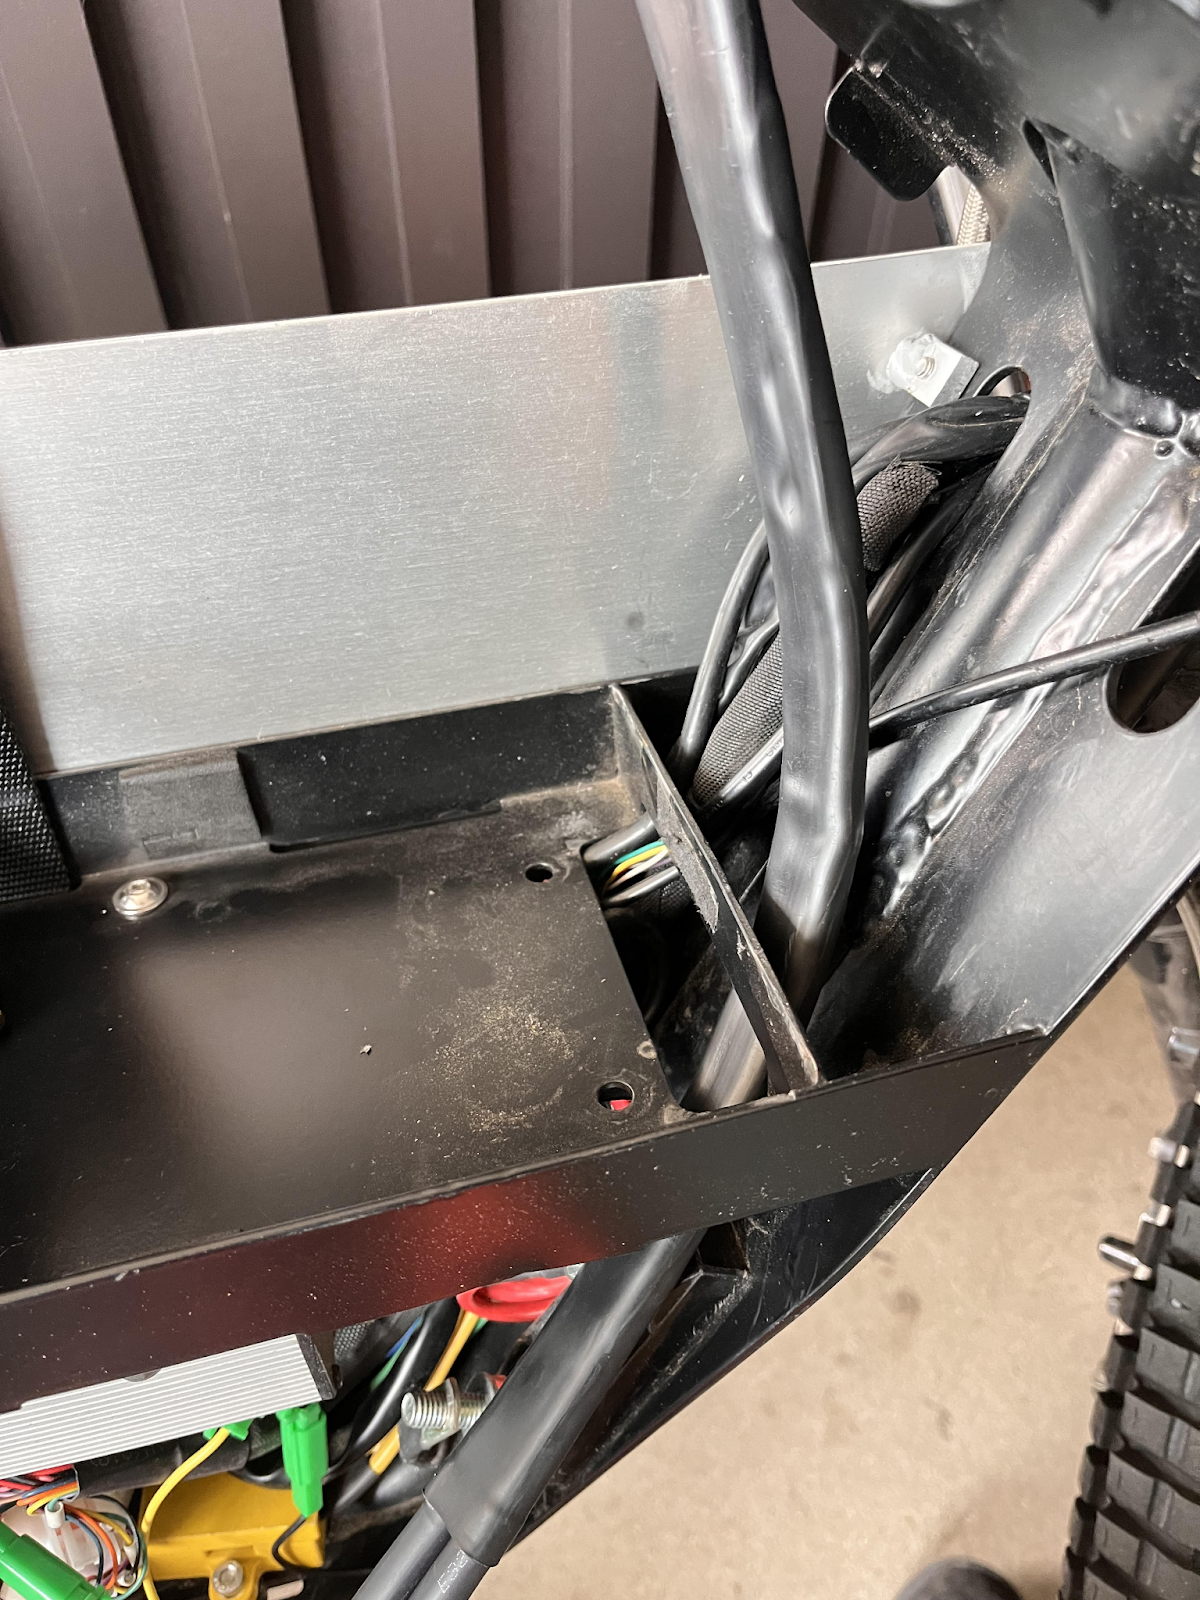
4. Install the QS8 Battery Cable
-
Route the new QS8 connector through the designated hole (see diagram/photo).
-
❌ Do not route it through the hole inside the battery tray — this will interfere with battery placement.
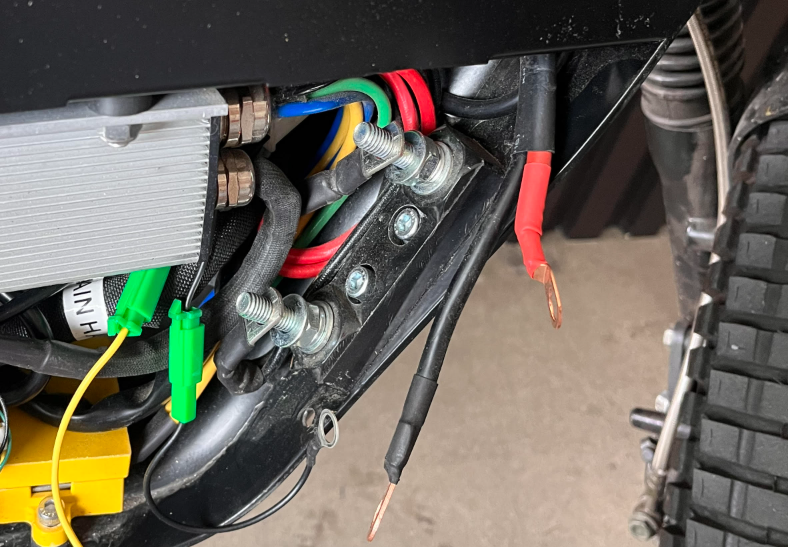
5. Connect to Terminal Posts
-
Attach the new positive (red) and negative (black) ring terminals to the matching posts.
-
These terminals should sit:
-
On top of the battery/controller lugs
-
Underneath the terminal post nuts
✅ Color Match Reminder:
-
Red → Yellow/Positive
-
Black → Black/Negative
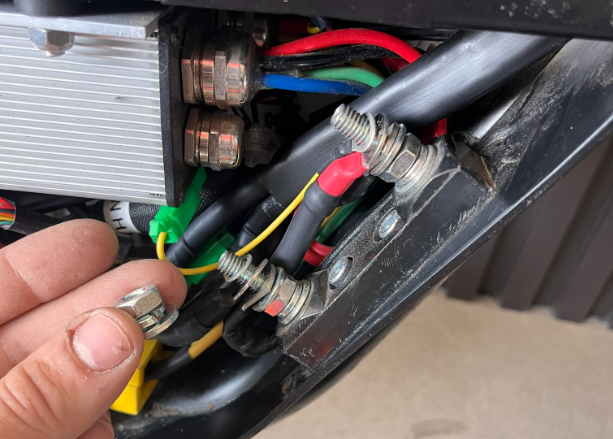
6. Secure the Installation
-
Tighten the nuts using a 14mm wrench.
-
Reattach the righthand side panel.
-
Reinstall or slide the seat back into position and tighten seat nuts if loosened.